Tuesday, June 17, 2008

MLWOF becomes Inspired Bites!


Hi People! My Little World of Food is now Ispired Bites! Like the new name? I do, very much. It took weeks of brain power to come up with a two-word name that isn't already taken. By the way, I also took inspiredbites.com for future use. But I have some HTML programming to learn before I can use it.

So, why change over now to Inspired Bites? I was saving my new name and domain until I learned some online programming, but a few days ago my world was shattered.

An awful lot of the people who visit my site come here through a site called TasteSpotting, which shut down over the weekend without warning. I freaked out, wondering how I would get people to know that I'm out here in the World Wide Web.

I am now submitting my posts to a number of new sites that cropped up in the absence of TasteSpotting. It just makes sense for people to get to know me on these new sites under my new name.

I'm in the process of moving all my posts (or at least copying them) from My Little World of Food, so please be patient while I check my links and continue to move the 75 posts I have made since beginning my blog in March.

Follow this link and be welcomed to Inspired Bites everyone! I hope you like it there!

Meryl

I'm a liar!

Saturday, May 3, 2008

Let's Learn About Spain And Its Food

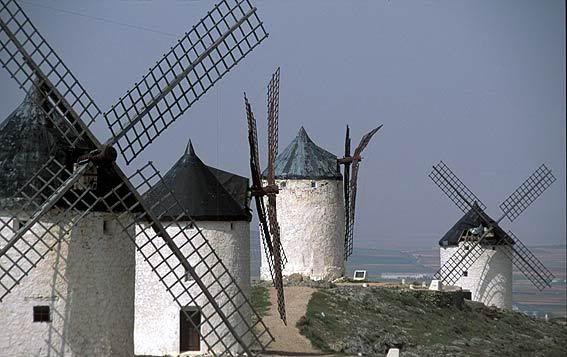
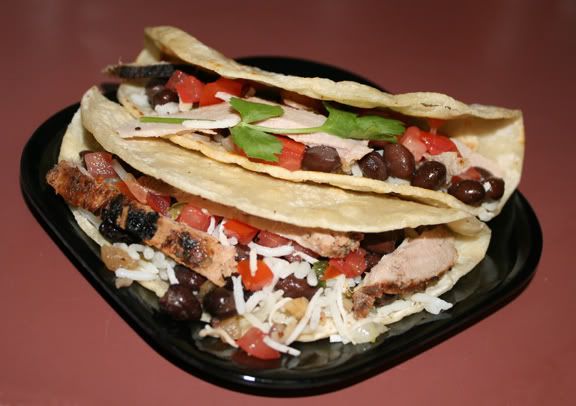
My favorite restaurant in the closest city nearby is a Spanish one, Bocado Tapas Wine Bar. I have only been there a few times, but after being amazed by the food, I realized that I really know close to nothing about Spanish cooking, as opposed to Mexican and Central American cooking. I'd like to make a generalization here and say that the general population in this area has no idea about this distinction.

Why, just the other morning, I stopped at my local 24 hour Stop and Shop supermarket and I was in the ethnic isle. Their hanging sign called it "Spanish Foods," but I noticed that there isn't a single Spanish food in that isle. It's all Caribbean and Mexican. Interesting....

Other than my few dinners at Bocado, I've watched travel shows in which the hosts visit Spain and eat sardines, octopus, anchovies, and other things that sort of turn me off from the sea. I knew that there just had to be more that I was missing out on. Enter Public Television.

This past February a new series called Made in Spain with José Andrés began showing on PBS. On his Web site, his bio states that he is "internationally recognized culinary innovator best known for bringing both traditional and avant-garde Spanish fare to America." He has been recognized by the James Beard Foundation and has restaurants in Washington, D.C. Oh, and might I add that he was a guest chef and winner on Iron Chef America. Bravo, José!

I've watched the series about five times so far, and I have it set to tape all episodes on my DVR. The episode that I began watching today, titled The Magic of Saffron and Cervantes, is a good one! The episode takes place in the region of Spain called Castilla La Mancha (La Mancha for short), which is the setting for the famous epic Don Quijote (also spelled Don Quixote). In addition to the Manchego cheese that comes from this area, Castilla La Mancha has very well known for its windmills which were used to grind wheat.


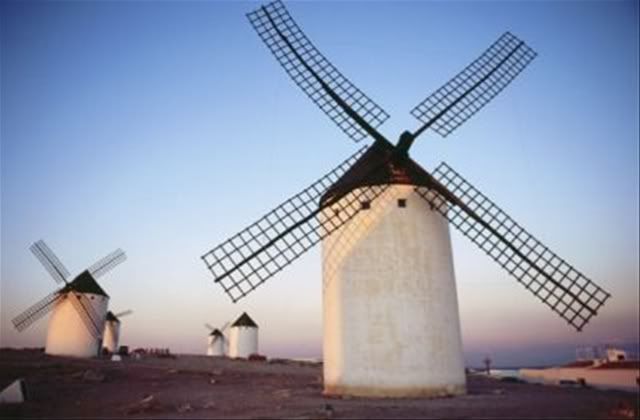
Spain is located on the Iberian Peninsula, which it shares with Portugal. Politically, it has 17 regions (autonomous communities). Castilla la Mancha is the big, yellow one in the center.


But each of those regions gets further broken down into a total of 50 administrative provinces.

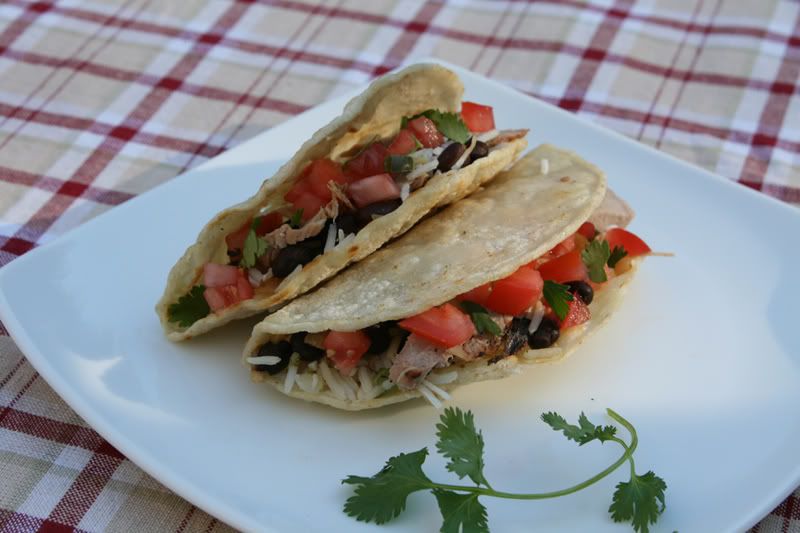
How timely, because I am also just starting to read a Spanish comic book version of Don Quijote de la Mancha so I can teach it to my students and have them read it. I am going to burn a DVD with this episode and share clips of it with my students so they can have a more enriching experience. The clips I'll show have examples of language, scenery, and lifestyle. Maybe I'll even share this dish for a tomato and manchego salad that I got from the episode with them.

Friday, April 18, 2008

Pondering Chocolates at CVS

It was a little over a year ago that I attended a chocolate tasting class outside of Boston. It was fun, and I learned a little about chocolate, its ingredients, and varieties. Then we did some tasting. Cool.

At the time I was just starting to branch out from eating Hershey’s and trying brands like Vosges, Café Tasse, Dolfin, Pralus, Chuao, and Green & Black’s. I liked them all, and once in a while I’ve been buying good brands either online or in Harvard Square (Cambridge, MA) when I’m there.

It seems like I’m riding the wave of Americans who are buying more sophisticated chocolates, and now grocery stores and pharmacies are offering better selections and trying to cater to people like me. But unlike those people, I distrust the Hershey’s Reserve, the Russel Stover, and the others (even Ghirardelli). I’m okay with Lindt. I do buy it – it’s readily available, and I like the small squares, even if it is sort of mass-produced.

Just last week I was in the checkout line at CVS and I noticed they had a number of little Starbuck’s chocolate boxes filled with tasting squares.

According to Cybele at The Candy Blog, Starbucks and Hershey’s are collaborating in making this product line. I’ve also noticed recently that Hershey’s bought Scharffen Berger chocolates and I guess somehow they also own the organic Dagoba line of organic chocolates which a lot of people like.

I bought the Starbucks variety pack with milk, dark, and mocha dark chocolates. The box says they are “bite sized excursions to new realms of chocolate and coffee.” How tempting! The package weighs 2.64 ounces, and it was a little expensive at $4.99 for the 15 miniature tasting squares. But I decided to indulge.


While a little on the expensive side, for the most part, I enjoyed them. I’m really not fit to judge the milk chocolate ones. I’m much more into dark chocolate, and I only got the milk because it was part of the package.

The dark was nice and smooth, melted well on my tongue, and I liked the flavor. The squares are really thin (perhaps even wafer-thin), so there wasn’t much “snap” which people will tell you is important when judging chocolate. That is because “snap” indicates a good balance between cocoa and butter. Dark chocolate should snap easily and make a clean break. That all got me thinking that maybe it’s not good to produce the squares in such a thin style. It’s also hard to let it melt on your tongue because it’s so thin that it melts almost immediately.

Let me just say that all tasting squares are on the thin side, but these were thinner than most. Oh, but id did have a pretty picture on the chocolate of a chocolate pod growing on a plant.


It’s kind of funny, because at first taste I liked the mocha dark the least. But in the end, I think I liked it the most! It’s got ground-up coffee beans in the chocolate, which throws me. I like a smooth chocolate experience, and this one is grainy. But maybe because the chocolate is so thin, it needed that extra texture. It had good flavor.

Would I buy these Starbucks tasting squares again? Not the milk, but I might try the others again. And I guess there are other flavors that I didn’t see and they sound interesting: passion fruit tea, chai, and citron flavored chocolate.

I had another visit to CVS today.

I stopped there to drop of a prescription on the way to work and I got a bar of Green & Black’s 70% dark. The petite 1.2 ounce bar cost $1.49. It has 12 tiny little squares that break apart. The squares are chunky – thick and small.


I probably haven’t had any of Green & Black’s chocolate for close to a year now, so I was looking forward to it when I opened the little bar and placed a tiny square on my tongue to melt. The melting was good, the chocolate was very smooth, but the taste was all wrong. It was totally burnt. I don’t think I’ll ever buy Green & Black’s again! How sad.

Did I become a chocolate snob?

No! I still like M&M’s, so it can’t be that. In fact, I love M&M’s. I love the candy coating. I have a little routine where I put the M & M in my mouth, standing up between my top and bottom teeth. I gently cut down, and the coating breaks away from the chocolate. I crunch it in my mouth and then let the little drop of chocolate melt on my tongue. It’s a moment of pure heaven. And because there’s a bunch of little M&M’s (even in a little fun-pack), I get to have that experience over and over before the package runs out.

Maybe that bar of Green & Black’s was a bad batch? Or, more likely, I guess I just no longer like their chocolate. That was a surprise.


Sunday, April 13, 2008

Taco-Making 101


I made these tacos with regular store-bought tortillas (Mission brand). But you can't just throw the ingredients in the center and fold them over. It just doesn't work that way.

I learned how to do it when I studied in Mexico for a summer. I went to Mexico to study Spanish. I began my stay with a family that I didn't care for. On top of that, the mother didn't cook! So when I asked my program for a family-transfer, requested to live with a family where the woman cooked. I am glad to say that I learned a little about Mexican cooking while I lived with them and studied Spanish.

Without a little taco-learning, you might just try to put your taco fillings on a corn tortilla and microwave it for a few. But it will break and fall apart when you try to eat it. It doesn't look pretty.

Here are some taco fillings on a tortilla:


Right after I took this picture, I folded the edge over, and this is what happened when I removed my hand:


This need not happen to you!

Here is one little trick I picked up in Mexico. Not only will your tortilla be more pliable, but it will taste better too!


  1. Heat up a small nonstick pan.
  2. Add maybe a teaspoon of oil. It should be just enough to lighly cover the surface of the tortilla when you put it in the pan.


  3. Put your fingers on top of the tortilla and glide the tortilla around the pan so that the oil underneath the tortilla spreads out its coverage on the bottom of your tortilla.


  4. to the left

    to the right


  5. Flip the tortilla over and repeat with the oil that is already in the pan.
  6. Cook the tortilla in that pan over high heat so it just barely toasts.
  7. Flip it back over and toast the other side as well. Here's the toasted tortilla:

The whole process only takes 2-3 minutes. Afterward, you will have a nice, tasty, pliable tortilla that you can fold over once your ingredients are on it.


When I folded these over, I put a plate on top for about a minute.


Then, when I removed the plate, the tacos held their shape. How awesome is that!


Here's my finished product: